Showing posts with label gradient. Show all posts

Tuesday, April 16, 2013

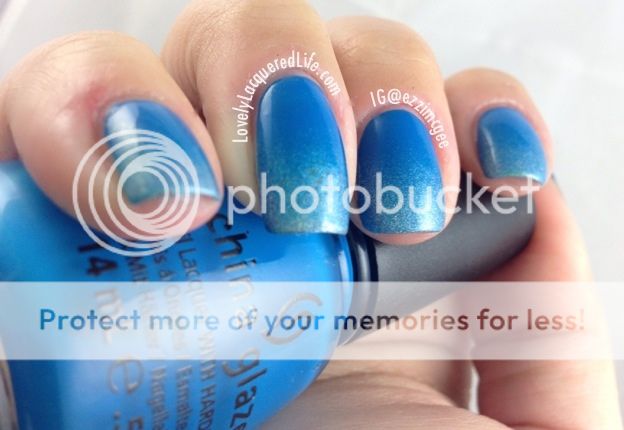
Blue Holo Gradient

This will be my 3rd mani for Autism Awareness month!
For this mani I used China Glaze Hanging in the Balance and Color Club Over the Moon.
I painted one coat of Hanging in the Balance and then used the sponge gradient technique and sponged on a couple coats of Hanging in the Balance and Over the Moon.  I was surprised at how well they blended.  Unfortunately, I was not able to capture the holo goodness that is Over the Moon, but in real life the subtle depth is very elegant.

On a sad note...the Boston Marathon bombings are weighing heavy on our nation and our hearts.  My husband is a runner (sometimes I am too) and we have both participated in the Houston Marathon in the past.  I can only imagine what the people of Boston are going through.  My prayers and thoughts are going out to all effected either physically or emotionally.  Yesterday (late) I saw notices on Instagram to paint your nails purple for Boston today (4/16), but it was too late to do so.  So I will paint it purple tonight and share tomorrow. 
Please continue to pray for our nation.

Tuesday, April 9, 2013

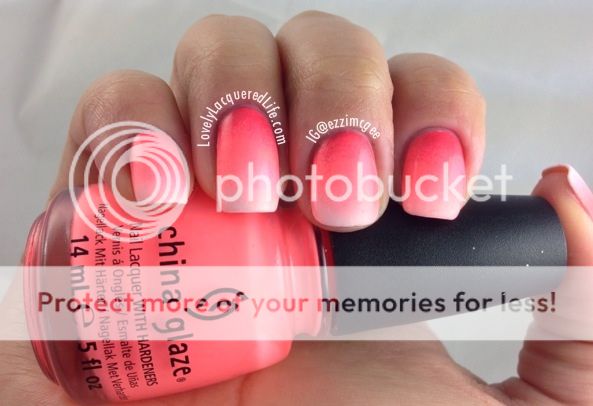
Coral Gradient


(source unknown)
Today's Coral Gradient mani was inspired by the awesome pic above (sourse unknown sorry)...mainly the colors on the surfboard.  I've never been a huge pink polish person, but lately I've been really diggin' the way corals look on my hands...makes me look tan..ha!
I really wish the true vividness of this showed up, but my camera just wouldn't have it.  In the pictures it looks like a nice petal pink but in real life its a neon coral gradient...and I mean NEON (much more orangey than showing here).  It's bright and happy and I love it. 
I used Sally Hansen White On, China Glaze Flip-Flop Fantasy, and Sinful Colors Tambleberry
What do ya think?

Monday, April 8, 2013

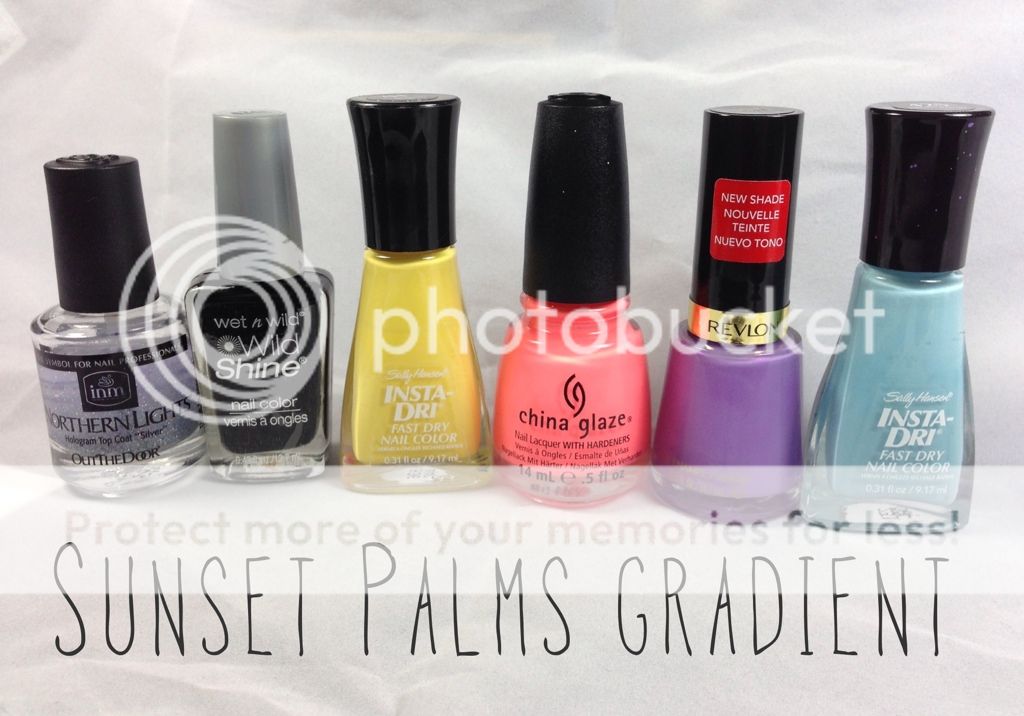
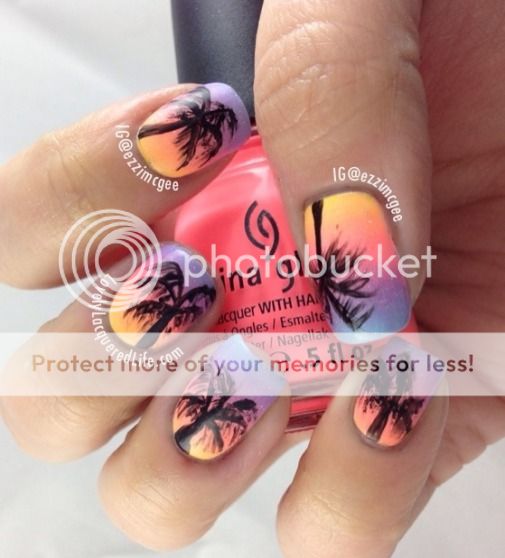
Sunset Palms Gradient

As I mentioned in my last post, the hubs and I took a mini vacation down to the beach over the weekend and I had to do a beach themed mani to match.
So today, a few days late, I wanted to show you what it looked like.
Love this mani!! Next time I will do my best to remember to make the design face away from me....geez I'm bad at that.  I had every intention of doing that until I started sponging the wrong way.  I also wish I had used black acrylic paint instead of polish.  It was drying to fast and getting sticky...much harder to get fine detail with sticky dragging polish.  Despite all the mishaps it turned out great. 
The base of this Sunset sponge gradient is Sally Hansen Blue-Away, Revlon Enchanted, China Glaze Flip-Flop Fantasy, Sally Hansen Lightning and INM Northern Lights.  The palm trees were done with Wet 'n Wild Black Creme and a striping brush.

Today is the start of Tuxarina's Spring Fling Nail Art Challenge, which I am participating in, but I am already a bit behind...ha!  Vacations have a way of doing that to people.  Today's challenge is Indie Skittle...which will be difficult because I don't have enough Indie polishes for a skittles mani.  I'll see what I can do...be back later.


Tuesday, April 2, 2013

Light it up Blue! Autism Awareness Month

(Sorry I don't know the creator of the above image - it's floating around the nail community on Instagram)

April is Autism awareness month and the nail community is "Lighting it up Blue" to raise awareness and support for those who have or love someone with Autism.  All month long you are encouraged to paint and post your blue mani's on Instagram using the tag
#bluenailsforautism or #Lightitupbluenails
Here is my first blue mani of the month.  Since many Autism groups use puzzle pieces as their logo/theme so I decided to replicate it as an accent nail using BM-319.  I filled in the puzzle pieces to match using Sally Hansen Rapid Red, Lightning, Blue Away and Pacific Blue.
The gradient was made with Kleancolor Metallic Blue, Sally Hansen Pacific Blue and Breeze Blue and IMN Northern Lights.

I am pretty happy with this mani.  The perfectionist in me wants the puzzle pieces to be neater, but I think it came out pretty good. 
More and more kids and adults are being diagnosed with different forms of Autism every day.  It may seem silly to paint your nails to show support or raise awareness, but every little thing helps...even if it's just to say you are loved and charished no matter what.  Let's do our part to find the missing piece to the puzzle.

Friday, March 8, 2013

Erin Go Bragh


Erin Go Bragh means "Ireland Forever"....just in case you didn't know.
And its my name...makes me happy.
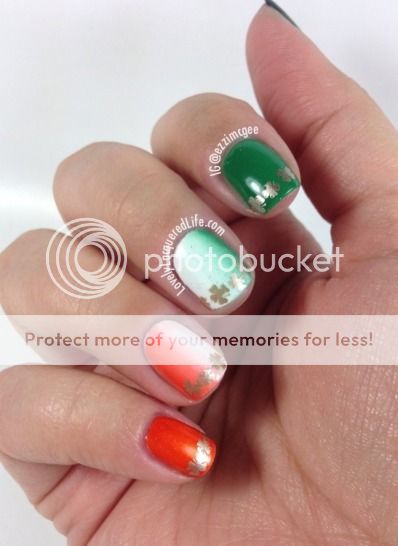
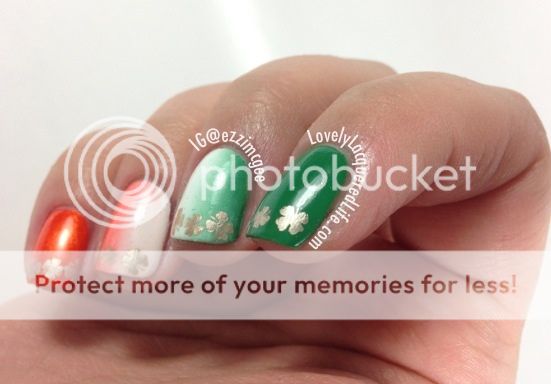
Today I have another St. Patrick's day inspired mani. 
I decided to do an ode to the Irish flag with a vertical gradient mani and some gold shamrock stamping.  I used a coat of Northern Lights, but I wish I hadn't because it just made it look like there are bits of dirt or something.  Note to self...NL doesn't look good on white.
Anywho, I like the way it out.
St. Patty's Day is only a week away!!

Monday, February 18, 2013

Candyland Gradient

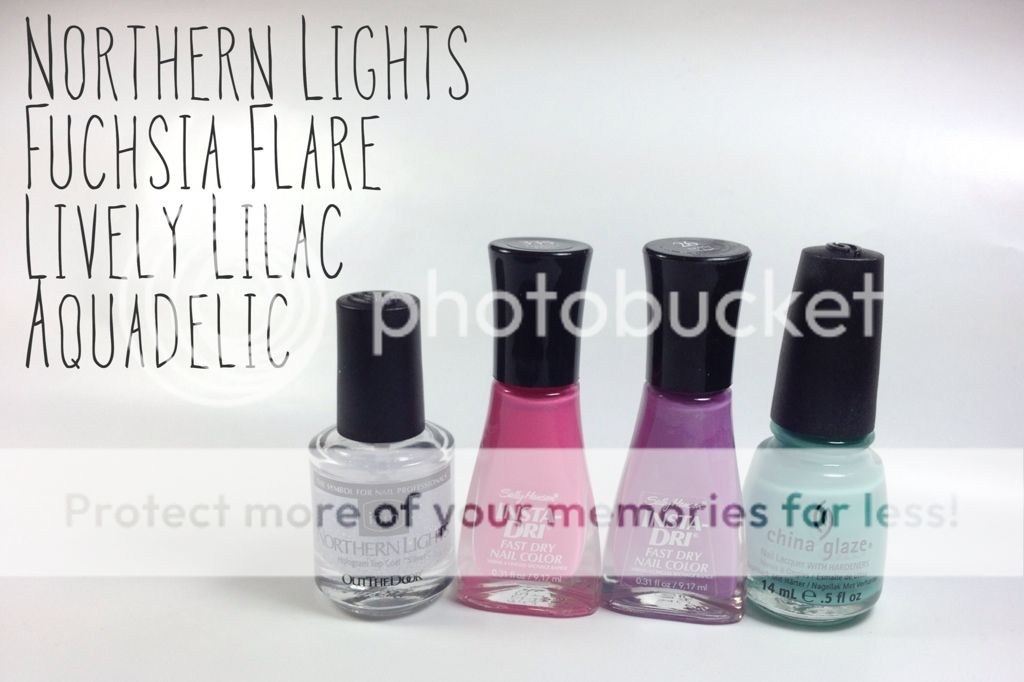
The gradient color combo I'm going to show you today isn't new.  In fact I have a screen shot of it from instagram so I could remember to try these colors together.  We all know that I'm slightly obsessed with doing gradient manicures....so one thing led to another and here we are today with what I am calling the "Candyland" gradient.
I used Sally Hansen Fuchsia Flare and Lively Lilac, China Glaze Aquadelic and topped it off with a coat of INM Northern Lights.
What do you think?  It screams candy right?
Or just springtime...whateves...I'm happy with it.
Hope y'all are having a good monday!


Thursday, February 14, 2013

Valentines Day Nail Art Challenge Day 6 - Your Choice

Today wasn't really a challenge day.  I wanted y'all to have the freedom to do what you wanted for Valentines day. 
I decided that since I have been doing detailed nail art for this challenge I should do something simple and elegant.
Here are my Glitter Gradient Valentines Day nails - Sally Hansen Flashy Fuchsia and Razzle Dazzler
I'm on the fence on how it came out.  Ive done glitter gradients before and they have looked better.  My Razzle Dazzler is old and getting really thick, so I had a hard time getting the gradient smooth.  They will do. 
I would like to thank everyone you has been reading and keeping up with my posts.  It means a lot.  Also super special thanks for my challenge participants Elena and Lynette.  I didnt expect anyone to participate in my challege, especially since I am new to the block, so it was really nice to meet these two and get their encouragement. 
Please go check out their Valentines Day nails:
1. Elena from Ecklipsed by Color
2. Lynette from Pink & Purple Dots

I hope everyone has a great Valentines Day!


Friday, February 8, 2013

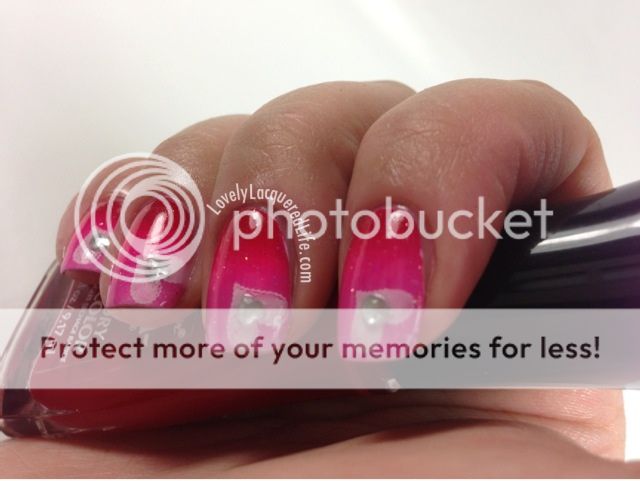
Valentines Day Nail Art Challenge Day 3 - Girly Gradient

I was looking forward to today's challenge.  I fell in love with the gradient technique a little while ago and will do it anytime I get a chance.  The only thing that was stopping me from doing it more often was the clean up process.  Well, not anymore....more on that later.
On to today's challenge - The Girly Gradient!!
What do you think?  This screams girl and valentines day.
A couple of weeks ago I showed you my expirement using glue around my cuticles to make the clean-up process easier with sponged gradients...which worked.  But I also mentioned that I had heard Liquid Latex was even better (the cheap version of Liquid Palisade) and that I would give it a try.  Man...let me tell you this is 10x better than using glue. 

Here is the little short video I put up on Vine last night showing how easy it is to "clean up" (vine user name is ezzi if you want to find and follow).
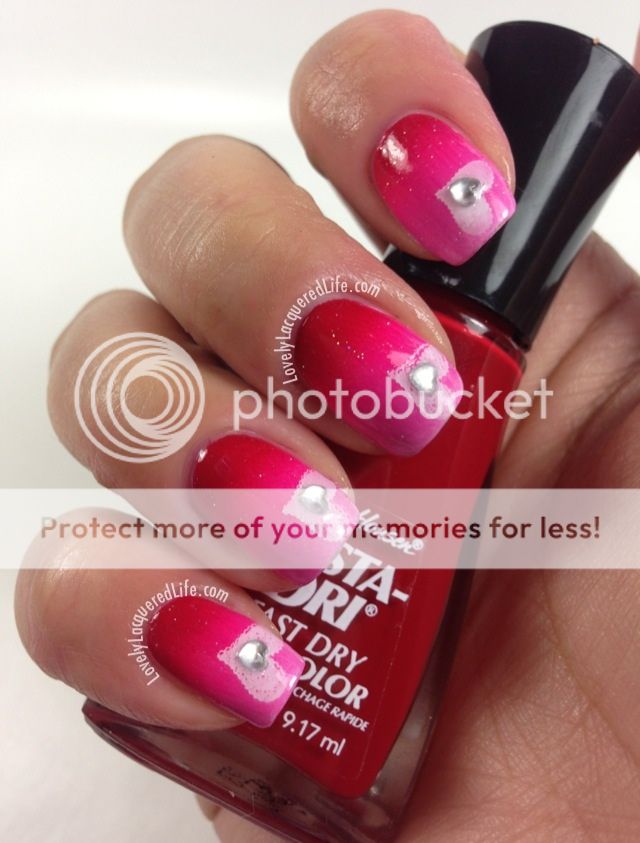
I used Sally Hansen White On as a base and sponged a combo of Sally Hansen Rapid Red, Urban Outfitters Hot Tub, Sally Hansen Rose Rush and White On and a coat of Northern Lights (not pictured).  Before I started sponging I brushed a thin coat of Liquid Latex around my cuticles (anywhere it gets messy) and it made this mani so much easier.  Virtually no clean up!!  It takes a little patience to get it brushed neatly and not on the nail itself, but totally worth it in the time it saves in clean up.  I bought this little bottle here and it will probably last me forever (about half as much as Liquid Palisade for twice as much...yes please!).
I also stamped a quick heart using a BM plate and Konad white (didn't stamp well for some reason..but it cant always be perfect) and added a little rhinestone heart for a little extra sparkle!

Please go check out the other participants of this challenge and share the love!
1. Elena from Ecklipsed by Color
2. Lynnete from Pink & Purple Dots

If you want to play along leave me a comment and I'll be sure to link you in my next post!!

Monday, January 21, 2013

Pink and Nude Gradient Mani (with easy cleanup?)

Remember how in my DIY Peel off Base Coat post I mentioned
that I would see if the glue helped in the cleanup process of a sponged gradient mani?
Well, I did....and it does!  Last week Sam from The Nailasaurus did a post on
Liquid Palisade, which is a masking product that allows you to simply peel off the mess after a mani is done.  This got me thinking...its pretty much the same idea of a peel off base coat which is really just glue.  Who didn't enjoy putting glue on your hand and peeling it off as a kid?

Anywho, I tried this technique this weekend by painting all around my cuticle and down my finger a bit (where I usually have mess from a sponge gradient).
After I let it dry (1-5 min) I painted as usual and then the fun began.
The mess just peeled away!  All I had to do was alittle cuticle clean up at the end and maybe a little warm water clean up to get any glue residue off.  Plus I got the added fun of peeling glue.
I have also read that Liquid Latex is a cheap alternative to Liquid Palisade.
Both dry to a rubbery finish, which I'm sure makes it easier to peel than glue, except that Liquid Latex is just pennies compared to Liquid Palisade.  I found this option on Amazon and it comes with a brush for around $4+shipping (around $8 total).  That's much better than $22. 
But if you don't want to spend any extra and you have some Elmers glue hanging around...go for it.  It works just as good!
Here is my finished mani.  My base was OPI "Don't Pretzel My Buttons" combined with a coral and hot pink from Sinful Colors for the gradient (dont remember the names at the  moment).  For grins I added a coat of Orly "Too Fab" mainly because I'm a little obsessed with the way it looks on top of everything.


Monday, January 14, 2013

Mermaid Mani (with Gals plates mini review)

Today I wanted to show you a mani I did this weekend.
If you follow my instagram (@ezzimcgee) im sure you have already seen it.
Here is a run down of what I used.
Whenever I do gradient sponge mani's I try really hard to start with 3-4 colors that naturally blend together...even if you cant tell there are 4 colors at the end.  I started with 1 coat of Sally Hansen Lickedy Split Lime and then sponged the 4 colors (listed in pic) about three times on each finger (you can do at least 2 fingers per sponge refresh), followed by 2 coats of Northern Lights to give it some sparkle.  Perhaps I'll do a video tutorial one of these days.
I dont know about you but blues and greens always make me think of mermaids...which made me think of my new Gals 2013 Princess plates (by Cheeky) and the fish scale print on plate GA14.  After reading some reviews I was hesitant to get these plates bc everyone had said the images were small.  They were right.  The normal Cheeky plates I have no problem with size, etc.  However, these are smaller length wise...and its mainly because the half-moon they are adding to the full nail images.  More on that later.  I stamped the scale image with Revlon 24K and used my favorite quick dry top coat - Sally Hansen Insta-Dri.  Also pictured is my fav base coat - Sally Hansen Hard as Wraps Acrylic Gel (keeps them strong) and Sally Hansen's new "Dry & Go Drops." The Insta-Dri top coat works just as fast a Seche Vite in my opinion just without the shrinkage, and the Dry & Go drops help speed things along.  I was able to paint my nails, put on top coat and drops and then get dressed 5 min later.  Worth it!!
On to the nails!
  I mentioned earlier that the Gals plate are short.  This pattern is not the best to demonstrate this but if you look on my middle and ring finger you might be able to see where the image cut off too short at the tip...and doesnt hit the base of my nail.  The full image really only fit my my pinkie....I didnt even attempt to stamp my thumbs.  If you have long nail beds like I do and keep any length at all you will have a problem with the short images.  On my left hand, currently all shortys (chain of successive breaks) I was able to get the full image, but just barely.  Had they not added the half-moons...or made the image longer and then added the half-moons they would be perfect.  That being said all the plates stamp crisp and clear.  I have not purchased the "Fairy" set yet, still on the fence.  Let me know what you think!!

Wednesday, December 19, 2012

12 Days of Christmas Nail Art Challenge Day 10 - Favorite Ornament

Today is Day 10 of Nicole's Christmas Nail Art Challenge - Favorite Ornament
I prefer the winter wonderland/frosty colors for Christmas....there is quite a lot of red and green elsewhere and I like to be different.
At home I have a white Christmas Tree and decorate with blues, turquoises, white and silver.   Because of my schedule I knew I would not have time to do a super difficult mani, so I chose to do snowflakes....which are all over my tree (you can see part of one in the pic)
I was always so intimidated by sponge gradients until I made myself do them....now I love them despite the clean up job.  
I sponged with a mix of Frostbite, Pacific Blue and White On.  Stamped silver snowflakes with a mix of plates and did a light coat of Northern Lights on top.  I think it came out pretty good.  What do you think?