Showing posts with label nail art. Show all posts

Monday, April 8, 2013

Sunset Palms Gradient

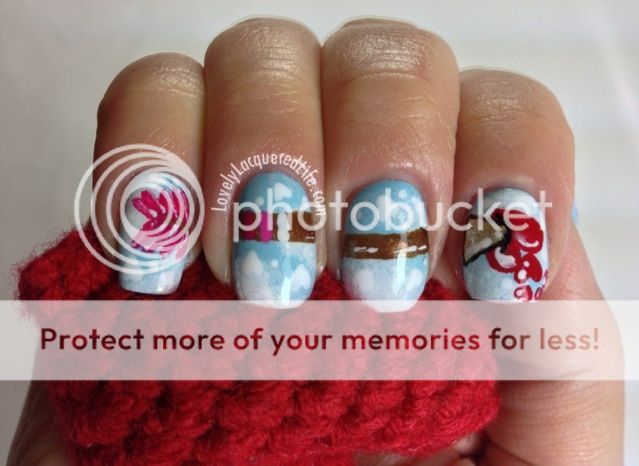
As I mentioned in my last post, the hubs and I took a mini vacation down to the beach over the weekend and I had to do a beach themed mani to match.
So today, a few days late, I wanted to show you what it looked like.
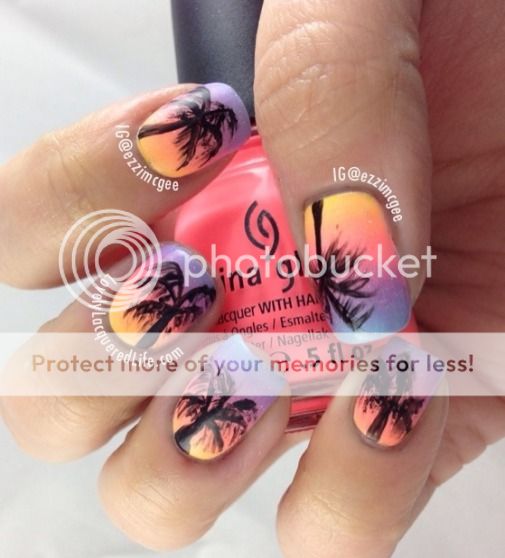
Love this mani!! Next time I will do my best to remember to make the design face away from me....geez I'm bad at that.  I had every intention of doing that until I started sponging the wrong way.  I also wish I had used black acrylic paint instead of polish.  It was drying to fast and getting sticky...much harder to get fine detail with sticky dragging polish.  Despite all the mishaps it turned out great. 
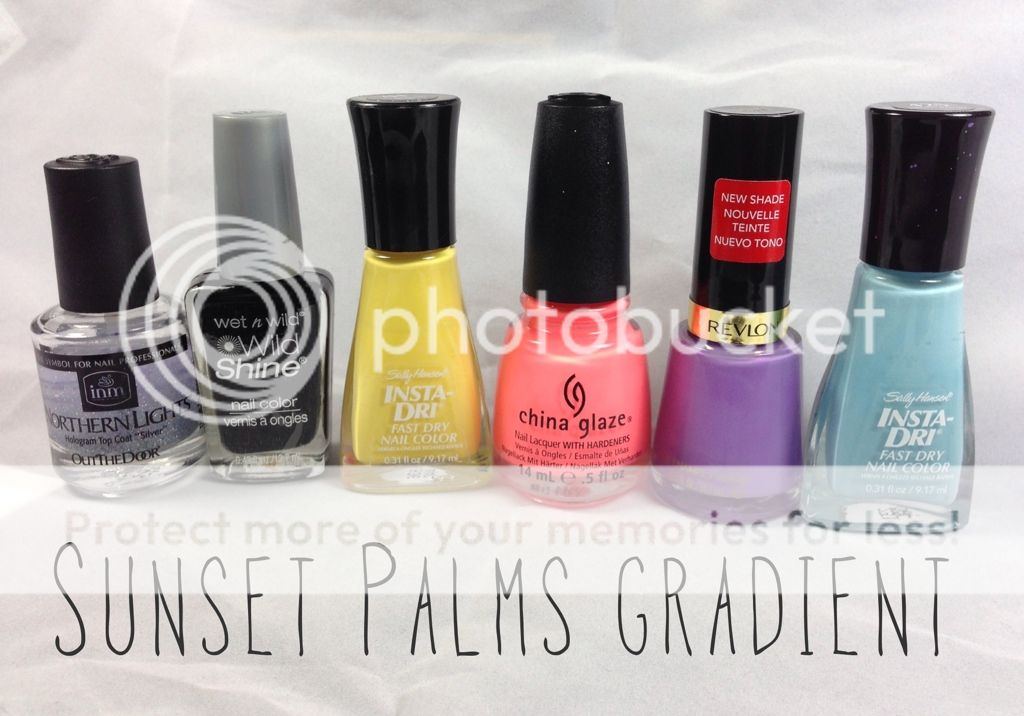
The base of this Sunset sponge gradient is Sally Hansen Blue-Away, Revlon Enchanted, China Glaze Flip-Flop Fantasy, Sally Hansen Lightning and INM Northern Lights.  The palm trees were done with Wet 'n Wild Black Creme and a striping brush.

Today is the start of Tuxarina's Spring Fling Nail Art Challenge, which I am participating in, but I am already a bit behind...ha!  Vacations have a way of doing that to people.  Today's challenge is Indie Skittle...which will be difficult because I don't have enough Indie polishes for a skittles mani.  I'll see what I can do...be back later.


Monday, March 18, 2013

St. Pattys' Day mani's - late

So the end of last week/weekend was busy and needless today I didn't get these posted here over the weekend.  If you follow me on Instagram (@ezzimcgee) then you may have seen these already.
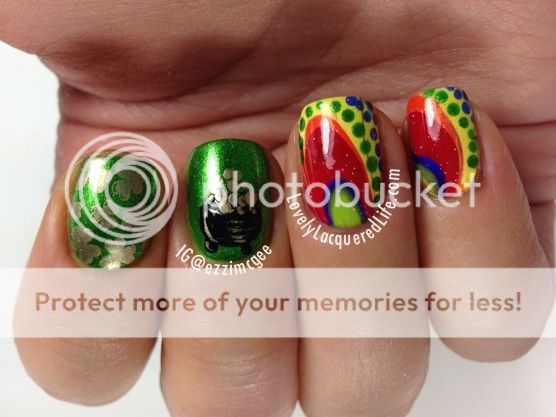
My first mani is a chevron version of the Irish flag with an accent nail.  For this mani I used Kleancolor - Metallic Green, Pure Ice - Hot Tamale, and Sally Hansen - White On.  The accent nail was Kleancolor Gold stamped with Metallic Green.
For my second mani I took inspiration from some other nail art pics I saw online/instagram.
I have not had much success with watermarbling, but I decided to give it another go.  I did a rainbow marble on my ring and pinkie finger - rainbow leading to the pot of gold.  Index and middle finger I used Kleancolor Metallic Green and stamped a pot of gold and shamrocks using my Bunny Nails HD-B plate.

I think these last two St. Patty's mani's came out ok. The one MAJOR downside is that the Kleancolor Metallic Green seriously stained my nails.  I had never used this polish (new to me) so I had no idea this would happen.  I was finally getting rid of some staining from a red Valentine's Day mani and now this!!
Yellow!! They are flippin' yellow! ugh.
Happy St. Patty's Day ....late.


Wednesday, March 13, 2013

Cartoon Drips

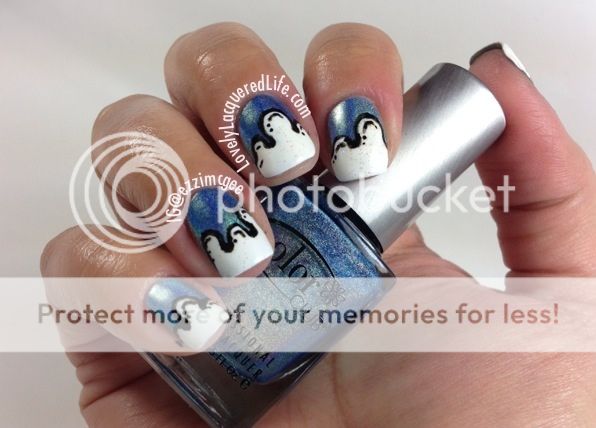
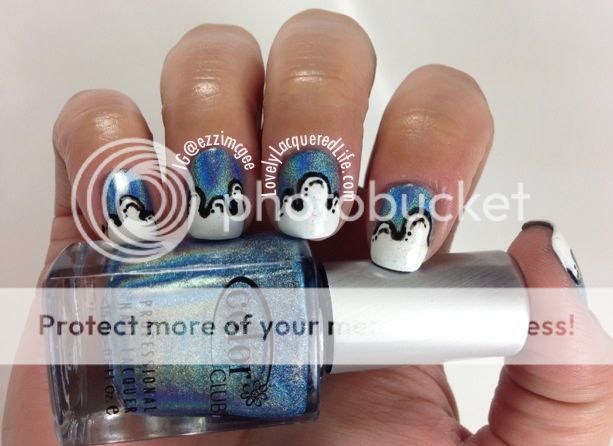
I know this has been done...a lot...but I have not done a drip mani yet so that's what I'm going to show you today.

For this mani I used 2 coats of Color Club's "Over the Moon" (2013 Halo Hue's) and used Sally Hansen "White On" and a dotting tool to make the drips.  For some added cool toned sparkle I used a coat of Confetti "Ice, Ice Baby" on the drips.  The "cartoon" part (the black outline) was done using Sally Hansen's Nail Art Pen in Black. 
Overall I think it came out great!  I think next time I will make thinner drips.  How do you feel about "Drip" mani's?  Yay or Nay?

Monday, March 11, 2013

NOTD: "Lucky Me" Cheetah

First off - Welcome new followers!!  I would like to thank the lovely Gwenn for giving my little corner of the interwebz a shout out. Please go visit and share the love on her blog Sweet Sugar .

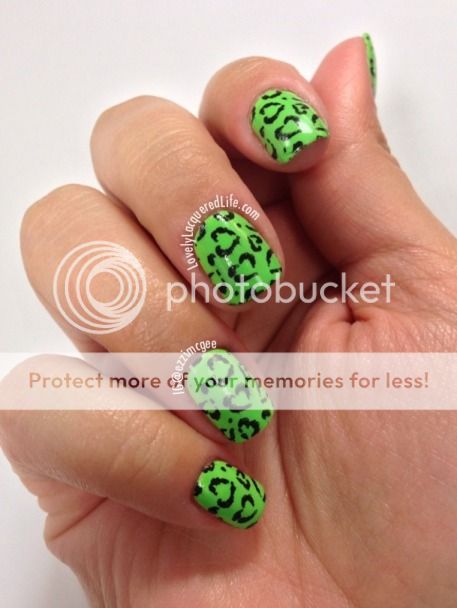
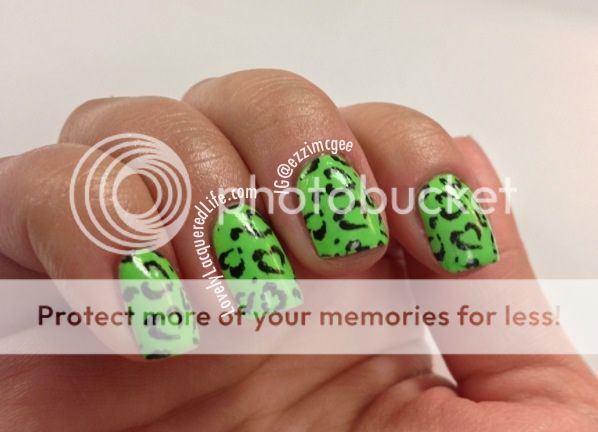
Now on to today's post.  I recently grabbed a set of Glow-in-the-Dark neon mini's from PolishMeToGo and wanted to show you one of them called "Lucky Me"
Lucky Me is a bright neon green glow-in-the-dark polish...much more bright and neon in real life.  I used two coats of white "undies" (you can order a white polish made for these GITD polishes on the site or use your own)  and 2 coats of Lucky Me for full coverage.  The polish is a little on the thicker side but still very easy to work with.  It dries pretty quick with a matte finish. 
I wanted to add something to it so it would have a fun pattern for it to glow through...so I stamped the heart cheetah pattern from my Bunny Nails HD2 plate using Wet 'n Wild Black Creme.  I topped the whole thing off with a coat of Sally Hansen Insta-Dri top coat (red bottle).
Ready for the fun part?
I only "charged" my nails for maybe a minute under my lamps and they glowed so bright in the pitch dark for a while.  It was funny when I got into bed...my hubs was like "what is that...are your hands glowing? (I could hear his eyes roll)" It also kinda freaked out the cat....I was petting her (she perches on my hip at night) and she kept following my fingers like she wasn't sure to attack or let the weird glow things keep petting her.  Ha!
This was my first purchase from PolishMeToGo and I am very pleased.  They came quickly and very securely wrapped.  Definitely head over and check out the store or look her up on instagram @polishmetogo
Hope everyone is adjusting better to the time change than I am...Happy Monday!

Friday, March 1, 2013

NOTD: Celtic Knots

St. Patrick's Day is one of my favorite holidays...so I have been on the hunt for some good plates to celebrate the holiday.
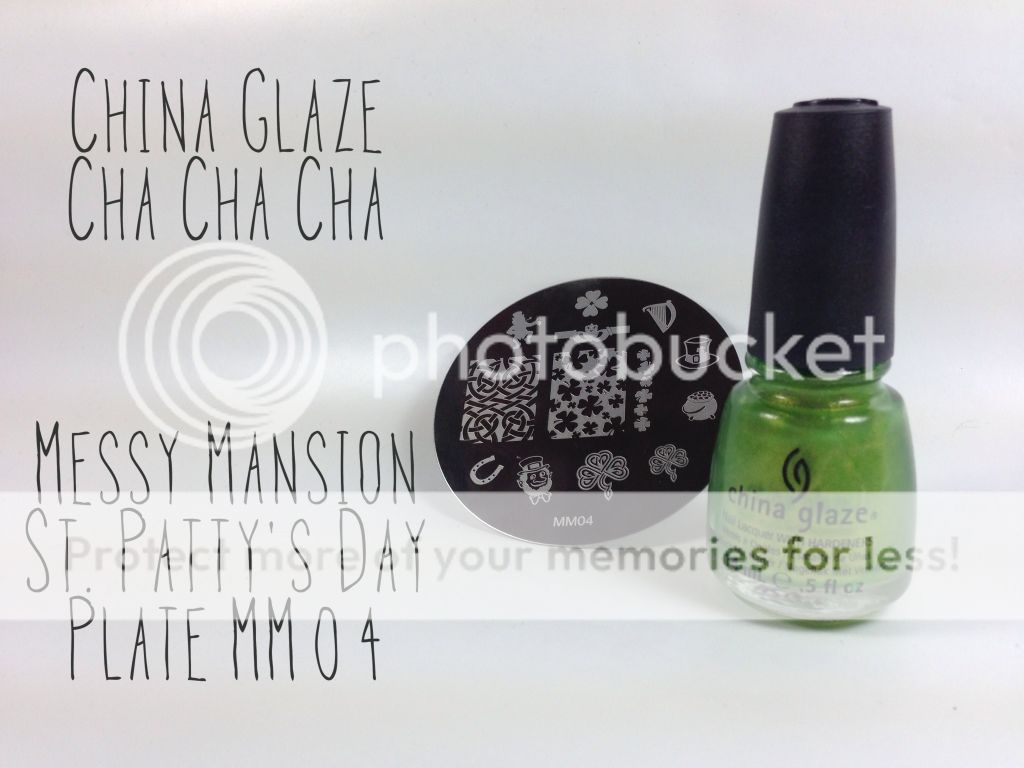
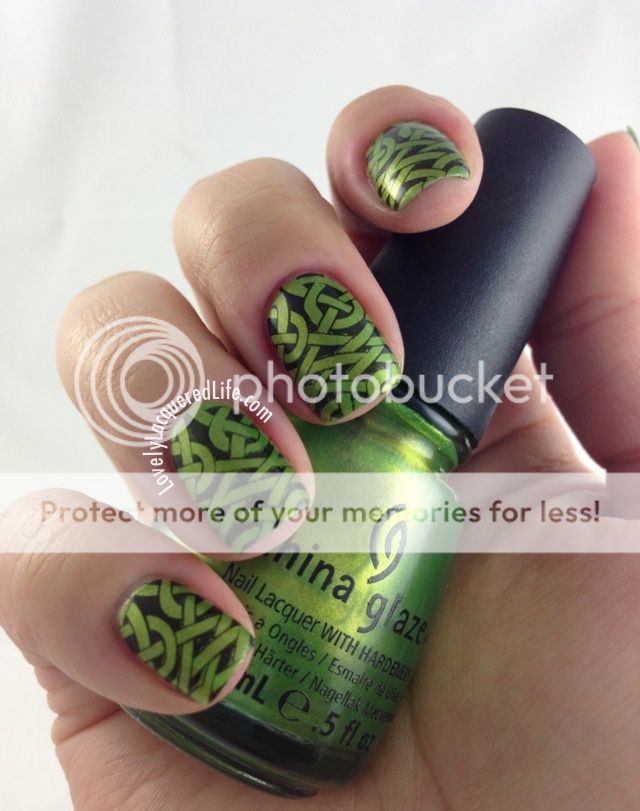
Today I wanted to show you one I got from Messy Mansion, plate MM04. 
There really isn't anything I don't love about this plate.  These designs are unique to anything I have seen and stamp perfectly! 
I used 2 coats of China Glaze "Cha Cha Cha" for a bright green background and stamped with Wet 'n Wild "Black Creme" (it stamps as well as Konad black but way easier to clean up) using the Celtic Knot full nail design.  The full nail designs on this plate are huge.  As you can see I only got about half of the design on my nail so wide nail bed or long nails wont be a problem.
Look forward to quite a few St. Patty's day themed nails this month!
Erin Go Bragh! (Ireland forever)

Wednesday, February 13, 2013

Valentines Day Nail Art Challenge Day 5 - Hearts

Only one more day left in this little challenge! 
Today's theme is Hearts.
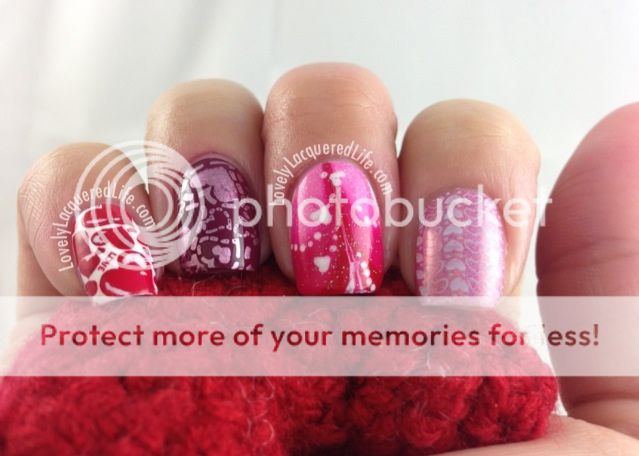
I knew going into this challenge that I was going to do some stamping, but I also wanted to try water marbling ( i know...i know...how have I not done this before?).  Earlier this week on instagram I saw an awesome heart shaped water marble (@milly_cutenails) and knew that I had to try it myself.  Lets just say its not easy to water marble, let alone capture a heart small enough to fit on your fingernail (tip use a small mouth cup).  I was able to make some successful hearts but once on my finger I realized it was much bigger than it looked in the cup.  Then I smeared a few, once on my nail, and had to re-do...boo.  I think I ended up attempting the heart about 5 times before I settled on what is on my middle finger here....1 finger!!!
So here is my Heart skittles mani
As you can see I only got the humps of my heart! But I think it turned out pretty.  I added some dots and little hearts with a dotting tool to cover any air bubbles and make it look more "heart" themed.  My other fingers were stamped with a mix of Bundle Monster and Cheeky heart themed nail plates.
Pinky - Sally Hansen White on stamped with Rapid Red (Insta-Dri)
Ring - Sinful Colors Truth or Dare stamped with Sally Hansen Pink Satin (Extreme Wear)
Middle - Marble of Sally Hansen Rapid Red, Flashy Fuchsia, White On, Northern Lights
Index - Color Club Miss Bliss stamped with Konad White

All in all im pretty happy with this mani.  What do you think?
Only one more day left and you get to choose what you want for Valentines Day.
Please go check out my fellow participants and share the love:
1. Elena from Ecklipsed by Color
2. Lynette from Pink & Purple Dots

Monday, February 11, 2013

Valentines Day Nail Art Challenge Day 4 - Cupid's Curse

Today's challenge is Cupid's curse.  I'll be honest, I have no idea why I threw this one in here and it has proved to be the most challenging of them all.  Not because of the skill needed to execute, but because no one knew what the heck to paint!  Me included. 
The first thing I think of for cupid is a naked angel baby with a bow and arrow and some pierced hearts....who thought up this stuff? It's creepy.  So I decided to go with an arrow and some hearts.
What do you think?  Meh, they are not my favorite mani from this challenge, but they will do.  I started with Sally Hansen Blue Away as a base and then sponged on some clouds with Sally Hansen White out, accented with China Glaze White Cap.  Then I pained the arrow with China Glaze Mahogany Magic and Zoya Jinx.  The hearts are Sally Hansen Rapid Red. Arrow tip is Revlon Gold Coin and arrow accents are Sally Hansen Rose Run and Flashy Fuchsia.
Only 2 more challenge days left!!
Hop on over and check out the other participants of this challenge and share the love:
1. Elena from Ecklipsed by Color
2. Lynette from Pink & Purple Dots

If you would like to join in the fun, it's not too late.  Send me an email with your link and I'll add you to the participants list!.

Friday, February 8, 2013

Valentines Day Nail Art Challenge Day 3 - Girly Gradient

I was looking forward to today's challenge.  I fell in love with the gradient technique a little while ago and will do it anytime I get a chance.  The only thing that was stopping me from doing it more often was the clean up process.  Well, not anymore....more on that later.
On to today's challenge - The Girly Gradient!!
What do you think?  This screams girl and valentines day.
A couple of weeks ago I showed you my expirement using glue around my cuticles to make the clean-up process easier with sponged gradients...which worked.  But I also mentioned that I had heard Liquid Latex was even better (the cheap version of Liquid Palisade) and that I would give it a try.  Man...let me tell you this is 10x better than using glue. 

Here is the little short video I put up on Vine last night showing how easy it is to "clean up" (vine user name is ezzi if you want to find and follow).
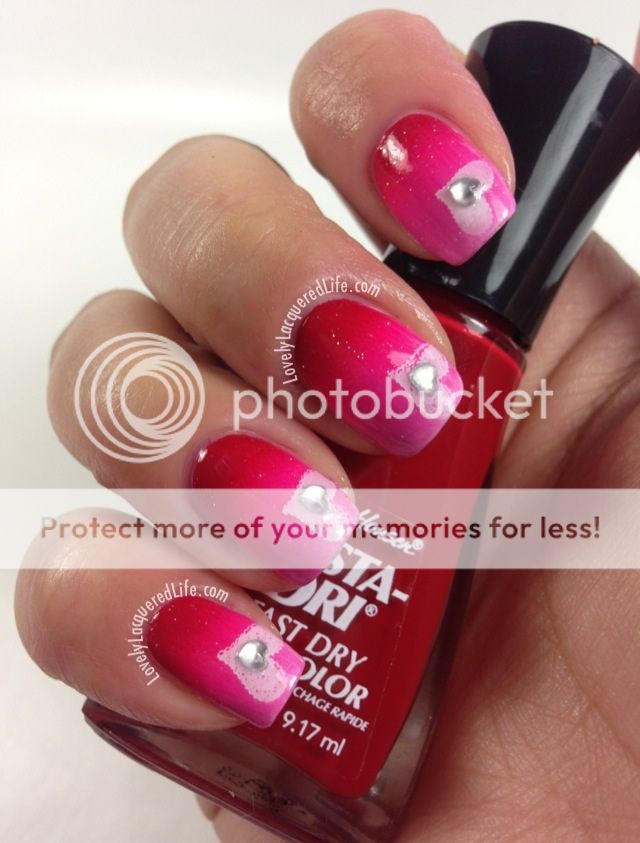
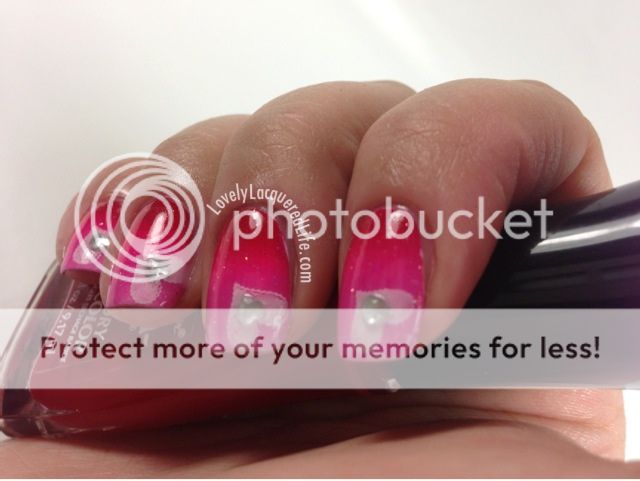
I used Sally Hansen White On as a base and sponged a combo of Sally Hansen Rapid Red, Urban Outfitters Hot Tub, Sally Hansen Rose Rush and White On and a coat of Northern Lights (not pictured).  Before I started sponging I brushed a thin coat of Liquid Latex around my cuticles (anywhere it gets messy) and it made this mani so much easier.  Virtually no clean up!!  It takes a little patience to get it brushed neatly and not on the nail itself, but totally worth it in the time it saves in clean up.  I bought this little bottle here and it will probably last me forever (about half as much as Liquid Palisade for twice as much...yes please!).
I also stamped a quick heart using a BM plate and Konad white (didn't stamp well for some reason..but it cant always be perfect) and added a little rhinestone heart for a little extra sparkle!

Please go check out the other participants of this challenge and share the love!
1. Elena from Ecklipsed by Color
2. Lynnete from Pink & Purple Dots

If you want to play along leave me a comment and I'll be sure to link you in my next post!!

Wednesday, February 6, 2013

Valentines Day Nail Art Challenge Day 2 - Roses

Today is Day 2 of my little challenge - Roses!!!
I was nervous about putting this one in there, because roses can be hard.
I figured I could always stamp them with one of my many plates with rose motifs, but then I was like..."no, this is supposed to be a 'challenge'."
I have always wanted to try "one stroke" roses with acrylic paints, so I did what I always do and trolled through videos on YouTube to learn how.  I have been painting my entire life and have done commission artwork for many years so I thought this would be a piece of cake.  I wish I could say it was, but it was definitely a challenge.  If I had better quality acrylic paints then I think this would have been much easier.  FYI the Michael's brand craft acrylic paint is worthless for this type of art.  You really need to find an acrylic paint that is highly pigmented and has a "high viscosity."  Mine were so sheer that it took going over everything with 4 coats of paint just to make it opaque....so annoying.   Without further ado....my first try at one stroke roses.
What do you think?  I think they turned out ok.  I think my index, ring and pinkie came out great....middle finger is a little wonky.  I used Sally Hansen Spring Green as a base and used a combo of red, coral, pink and white acrylic paint.  I had to use 3 coats of topcoat to get it mostly smooth.  Something about the paint and the topcoat was weird because I got giant bubbles in my topcoat, I managed to smooth them over but it was making me mad.
Once I get some better quality paints I will definetly try this again.  Have you tried one stroke flowers?  Would you like a tutorial?

Please check out the other participants of this challenge:
1. Elena from "Ecklipsed By Color"
2. Lynette from "Pink & Purple Dots"

If you would like to play along with my Valentines Day Nail Art Challege leave me a comment with your info (blog, instagram, etc) and I'll link you in my posts so others can see!

Monday, January 14, 2013

Mermaid Mani (with Gals plates mini review)

Today I wanted to show you a mani I did this weekend.
If you follow my instagram (@ezzimcgee) im sure you have already seen it.
Here is a run down of what I used.
Whenever I do gradient sponge mani's I try really hard to start with 3-4 colors that naturally blend together...even if you cant tell there are 4 colors at the end.  I started with 1 coat of Sally Hansen Lickedy Split Lime and then sponged the 4 colors (listed in pic) about three times on each finger (you can do at least 2 fingers per sponge refresh), followed by 2 coats of Northern Lights to give it some sparkle.  Perhaps I'll do a video tutorial one of these days.
I dont know about you but blues and greens always make me think of mermaids...which made me think of my new Gals 2013 Princess plates (by Cheeky) and the fish scale print on plate GA14.  After reading some reviews I was hesitant to get these plates bc everyone had said the images were small.  They were right.  The normal Cheeky plates I have no problem with size, etc.  However, these are smaller length wise...and its mainly because the half-moon they are adding to the full nail images.  More on that later.  I stamped the scale image with Revlon 24K and used my favorite quick dry top coat - Sally Hansen Insta-Dri.  Also pictured is my fav base coat - Sally Hansen Hard as Wraps Acrylic Gel (keeps them strong) and Sally Hansen's new "Dry & Go Drops." The Insta-Dri top coat works just as fast a Seche Vite in my opinion just without the shrinkage, and the Dry & Go drops help speed things along.  I was able to paint my nails, put on top coat and drops and then get dressed 5 min later.  Worth it!!
On to the nails!
  I mentioned earlier that the Gals plate are short.  This pattern is not the best to demonstrate this but if you look on my middle and ring finger you might be able to see where the image cut off too short at the tip...and doesnt hit the base of my nail.  The full image really only fit my my pinkie....I didnt even attempt to stamp my thumbs.  If you have long nail beds like I do and keep any length at all you will have a problem with the short images.  On my left hand, currently all shortys (chain of successive breaks) I was able to get the full image, but just barely.  Had they not added the half-moons...or made the image longer and then added the half-moons they would be perfect.  That being said all the plates stamp crisp and clear.  I have not purchased the "Fairy" set yet, still on the fence.  Let me know what you think!!

Thursday, January 10, 2013

Preview of the Valentines Day Nail Art Challenge Schedule

I know...I know...its way to early but I couldnt help myself. 
I have only psuedo-participated in a Christmas Nail Art Challenge and loved it!!
I was trolling around to see if anyone had posted a Valentines Day Nail Art schedule and couldnt find one...bummer. 
But then I thought...."why the heck cant I make my own?"
I dont know the protocol on properly making or "joining" a challenge so I'm going to open it up to whoever wants to participate.  Tag my user name on Instagram (@lovelylacqueredlife or @ezzimcgee) or email me a pic/blog link and ill be sure to list you in my posts so other people can check it out!