Showing posts with label Revlon. Show all posts

Wednesday, May 1, 2013

NOTD: Zelda Nails - Happy Birthday Hubs

It's been about a week since I blogged last....life is crazy...sorry.
Today is my husbands birthday and to commemorate the day I used one of my new MJ nail plates from (MyOnlineShop) to stamp the logo of his favorite video game....Zelda!

I didn't take as many pictures of my nails as normal mainly for time reasons, but you get the idea.  Just a plain and simple mani with a small stamp.  I used 2 coats of China Glaze Running in Circles (best green foil fleck ever!!) and stamped with Revlon 24k and MJ plate XIV.

This post isn't really a review post (I will do a more thorough one later) but I did want to show you the plates I picked up from the new MJ plate release.  If you would like to see what the other plates in the collection look like head on over to Spellbinding Nails (Sarah always has the word on new plates - both indie and commercial).
The special edition plate is full of Disney and many more popular characters!! 
 XIX has some really neat full nail images plus a bunch of great text for all occations.  Soo much on this plate to love.  The text images are small and can be hard to read, but they have to fit on your nail afterall.
XIV is popular logo central!!  
 Im not going to lie.  I wanted this plate mainly for the Doctor Who and Mario images, but there are some other really cool ones as well.
All plates are backed, however, if you try hard you could cut yourself, but why would you try to?

Like I said before, I'll do a proper review soon.  For now I would like to wish my wonderful husband a Happy Happy Birthday!


Monday, April 8, 2013

Sunset Palms Gradient

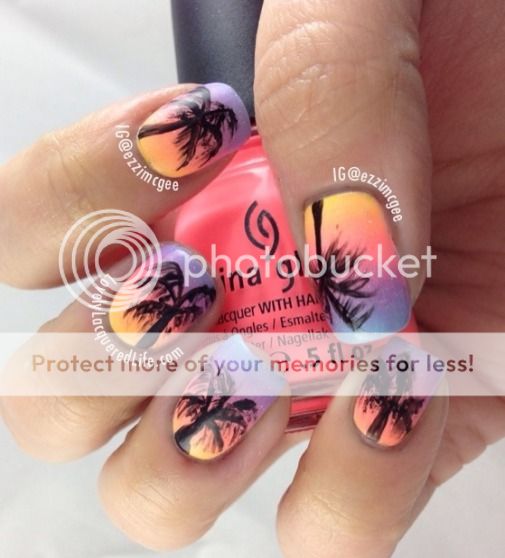
As I mentioned in my last post, the hubs and I took a mini vacation down to the beach over the weekend and I had to do a beach themed mani to match.
So today, a few days late, I wanted to show you what it looked like.
Love this mani!! Next time I will do my best to remember to make the design face away from me....geez I'm bad at that.  I had every intention of doing that until I started sponging the wrong way.  I also wish I had used black acrylic paint instead of polish.  It was drying to fast and getting sticky...much harder to get fine detail with sticky dragging polish.  Despite all the mishaps it turned out great. 
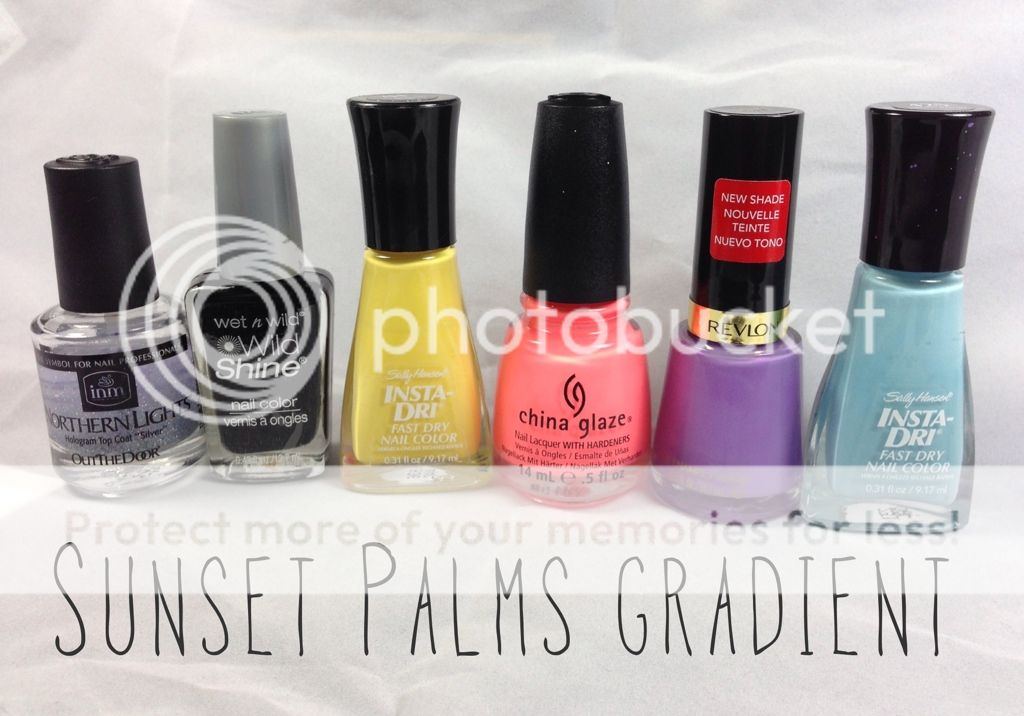
The base of this Sunset sponge gradient is Sally Hansen Blue-Away, Revlon Enchanted, China Glaze Flip-Flop Fantasy, Sally Hansen Lightning and INM Northern Lights.  The palm trees were done with Wet 'n Wild Black Creme and a striping brush.

Today is the start of Tuxarina's Spring Fling Nail Art Challenge, which I am participating in, but I am already a bit behind...ha!  Vacations have a way of doing that to people.  Today's challenge is Indie Skittle...which will be difficult because I don't have enough Indie polishes for a skittles mani.  I'll see what I can do...be back later.


Tuesday, January 29, 2013

Revlon Enchanting with subtle stamping

Today I wanted to show you a swatch of Revlon's Enchanting
with some subtle stamping with Zoya Jinx.
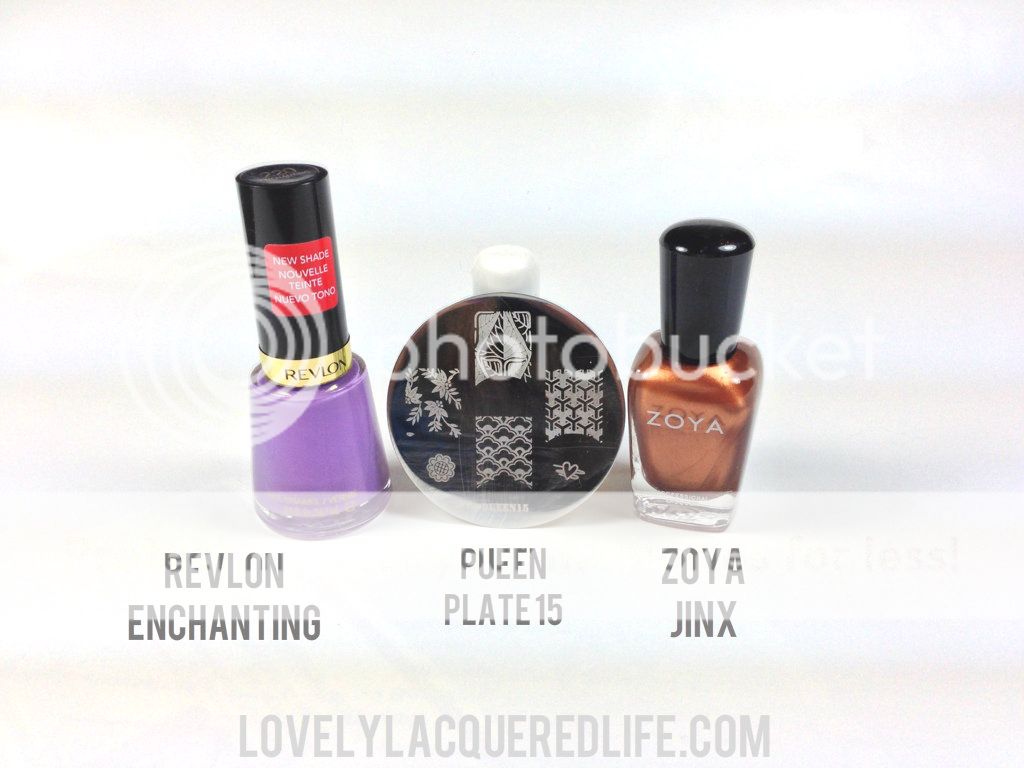
Enchanting, from Revlon's Spring 2013 Bubble Gum Days collection, is a bright lavender purple creme.  It has a barely noticeable pink shimmer in the bottle, that unfortunately does not translate to the nail.  The formula is very smooth and easy.  I used 2 coats of Enchanting, stamped with Zoya Jinx-beautiful copper/bronze (one of my freebies) and 1 coat of Sally Hansen Insta-Dri (red bottle).
I used Pueen plate 15 for the full nail design.  If you have not heard of Pueen, look it up.  They have great designs that I have not seen anywhere else.  I have tested each plate, and with the exception of a few they all work great....very clean lines. There are a few designs that are way to detailed and they end up being blobs (I can deal with 3 designs not working out of all of them). The full nail images are long enough for short to medium (my current length) nails and have the built in half moon at the bottom of the full nail images.  I might be able to get the full stamp if my nails were a little longer, but it would be stretching it. You can find them on Amazon for around $18.
I love this purple!  I also really love Jinx.  Can't wait to try her on her own!  These two colors created such a lovely subtle mani.  From far away you cant even tell there is a stamp, just shimmer, but up close you can see the delicate pattern. 

Thursday, January 24, 2013

Color Club Blue-Ming and gold stamped mani

Have I mentioned how much I love mint green?
Well...anything in the mint green and turquoise family really, especially when it is paired with gold.
It's such a great combo...never gets old in my book
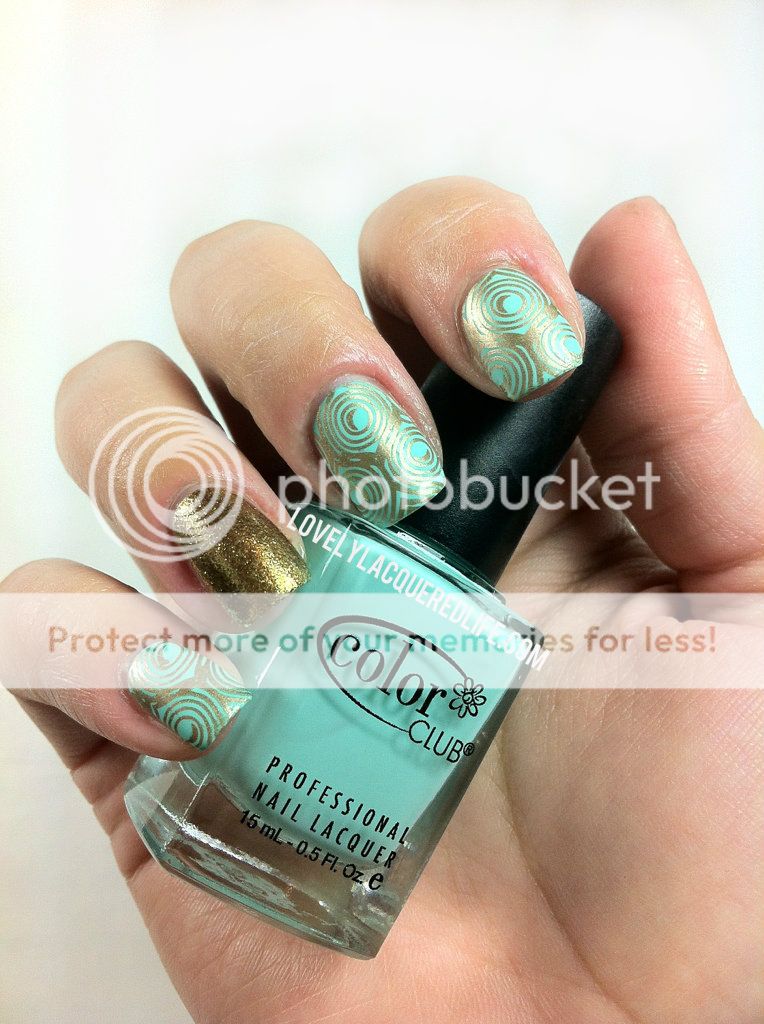
Today's mani was done with Color Club's Blue-Ming and stamped using Revlon 24k (Cheeky XL plate B) and decided to add an accent finger with OPI Goldeneye.
Pretty right? I love Blue-Ming!  It's like the brighter/neon brother of China Glaze Re-Fresh Mint (my all time favorite polish ever!!).  I did have to add a couple drops of thinner to my bottle, but its pretty much perfect now.  I used 2 coats of Blue-Ming and 2.5 of Goldeneye all topped off with 1 coat of Sally Hansen Insta-Dri top coat.

I want to take a minute to mention the XL squishy stamper in the first pic.
  I'm in love with it a little.  I had seen it used in some YouTube videos (I always watch reviews before buying a new set of plates...just in case) and thought wow...that stamper looks like it would be really great.
In the past I have always used the pink Konad stampers,which work great, but I didn't like that they have very little cushion.  If you have long nails they will bend your nail when you stamp, etc. 
This XL squishy stamper on the other hand is different.  I don't know what kind of rubber/silicone this is but it's ridiculously squishy.  You dont have to "roll" the stamp on your finger.  You can just smoosh your finger face down on the pad and it will squish the design on all sides of your nail.  Can we say no more crooked stamps?! The pad is also slightly sticky so I find that it picks up the image better...like there is no more residue polish on your plate.  I highly recommend buying this stamper if you haven't already.  I purchased mine from this eBay store.  It costs a little more than other ones listed, but the seller is located in the US and I got it really quick vs. waiting 3-4 weeks.  There is a video included in the listing so you can see the awesomeness of this stamper.

Ok...enough ranting. I'll be back with more swatches later.

Monday, January 14, 2013

Mermaid Mani (with Gals plates mini review)

Today I wanted to show you a mani I did this weekend.
If you follow my instagram (@ezzimcgee) im sure you have already seen it.
Here is a run down of what I used.
Whenever I do gradient sponge mani's I try really hard to start with 3-4 colors that naturally blend together...even if you cant tell there are 4 colors at the end.  I started with 1 coat of Sally Hansen Lickedy Split Lime and then sponged the 4 colors (listed in pic) about three times on each finger (you can do at least 2 fingers per sponge refresh), followed by 2 coats of Northern Lights to give it some sparkle.  Perhaps I'll do a video tutorial one of these days.
I dont know about you but blues and greens always make me think of mermaids...which made me think of my new Gals 2013 Princess plates (by Cheeky) and the fish scale print on plate GA14.  After reading some reviews I was hesitant to get these plates bc everyone had said the images were small.  They were right.  The normal Cheeky plates I have no problem with size, etc.  However, these are smaller length wise...and its mainly because the half-moon they are adding to the full nail images.  More on that later.  I stamped the scale image with Revlon 24K and used my favorite quick dry top coat - Sally Hansen Insta-Dri.  Also pictured is my fav base coat - Sally Hansen Hard as Wraps Acrylic Gel (keeps them strong) and Sally Hansen's new "Dry & Go Drops." The Insta-Dri top coat works just as fast a Seche Vite in my opinion just without the shrinkage, and the Dry & Go drops help speed things along.  I was able to paint my nails, put on top coat and drops and then get dressed 5 min later.  Worth it!!
On to the nails!
  I mentioned earlier that the Gals plate are short.  This pattern is not the best to demonstrate this but if you look on my middle and ring finger you might be able to see where the image cut off too short at the tip...and doesnt hit the base of my nail.  The full image really only fit my my pinkie....I didnt even attempt to stamp my thumbs.  If you have long nail beds like I do and keep any length at all you will have a problem with the short images.  On my left hand, currently all shortys (chain of successive breaks) I was able to get the full image, but just barely.  Had they not added the half-moons...or made the image longer and then added the half-moons they would be perfect.  That being said all the plates stamp crisp and clear.  I have not purchased the "Fairy" set yet, still on the fence.  Let me know what you think!!

Wednesday, December 19, 2012

12 Days of Christmas Nail Art Challenge Day 8 - Christmas Tree

Ive been late in posting my Christmas Nail Art Challenge mani.
Friday was Day 8 - Christmas Tree 
Here is my Christmas Tree....a bit simple but I like it.  
Here are the colors I used as well as the addition of a silver star from my Cheeky rhinestone set I ordered here
Once again head on over to Nicole's blog to see her challenge mani's and the other participants of this challenge.  
I'll be back with Day 9 and 10 in a few.

Monday, December 3, 2012

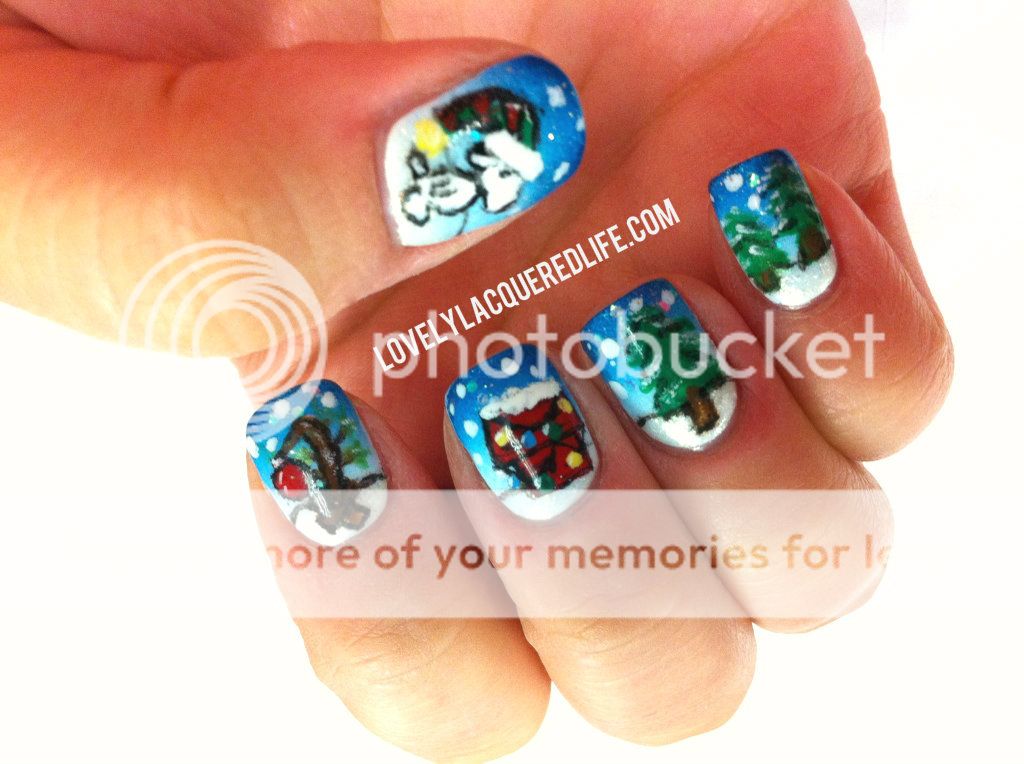
12 Days of Christmas Nail Art Challange - Day 3 Christmas Movie

As I said last week I am following along with Nicole's 12 Days of Christmas Nail Art Challenge. 
Today is "Christmas Movie"
As soon as I saw the challenge for today I knew I would do
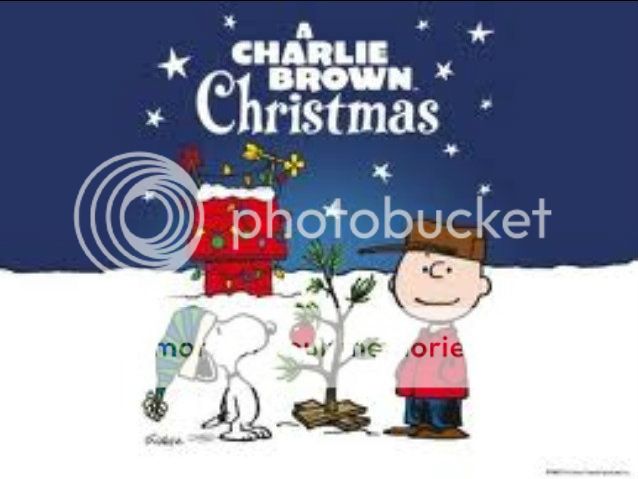
"A Charlie Brown Christmas."
This is the first time in a long time that I have done detail work on my nails and you can tell.  It's a bit sloppy, but it will do....I need better brushes that's for sure.
Snoopy could look a little better....hey at least he is somewhat recognizable! 
A little fact you probably don't know....I'm a lefty.  That means that my left hand got nothing more than some snowflakes falling on the  snow.  Looking back I probably shouldn't have defined the ground/skyline with black....it would have looked better just snowflakes on a gradient background.  O well.  It still looks neat.

Gradient Base:  OPI-Swimsuit...Nailed It, Savina-Sparkling Waters, Sally Hansen-White On and Snow Globe
Snow: China Glaze-White Cap
Snoopy: Sally Hansen-White On, Expres-so Yellow and Rapid Red, Pure Ice-Black Out, Revlon-Posh
Charlie Brown Christmas Tree: China Glaze-Mahogany Magic and Cha Cha Cha, Sally Hansen-Rapid Red, Revlon-Posh, Pure Ice-Black Out
Snoopy House:  Sally Hansen-Rapid Red and White On
Extra Trees:  Revlon-Posh, China Glaze-Cha Cha Cha and Mahogany Magic,
Sally Hansen-White On

This one was pretty fun. I definitely need more practice doing this kind of detail work. 
Until next time head over to Nicole's blog to check out her design as well as the other participants.


Monday, November 12, 2012

Boop-oop-a-dupe

My apologies in advance on how slap-dash this post is.
I stumbled across a polish a couple weeks ago on the Llarowe website and my jaw about hit the floor.  Its a Clarins 230 / Fantasy Fire (aka Unicorn pee) dupe.
Say What??!!??
Nail Pattern Boldness makes a polish called "Boop-oop-a-dupe" that has almost the same flash and fire that we have all be lusting after in Clarins 230 and Fantasy Fire.
In the bottle it doesn't look like anything other than a pink shimmer....it lies!
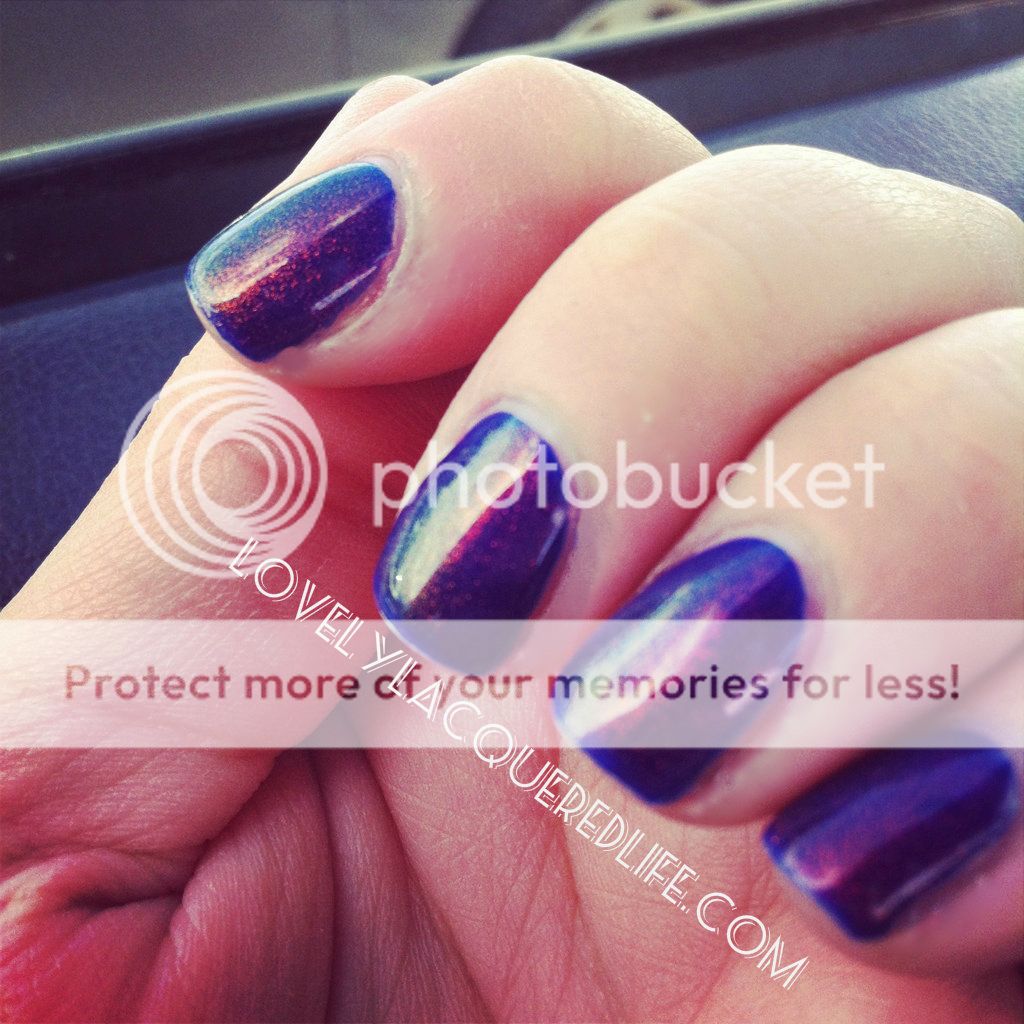
Since the swatch pics on the Llarowe site had it over Revlon Royal I decided to do the same just for my own comparison sake. 
Here is 2 coats of Royal by itself.  There is a slight VNL (visible nail line) but I was in a hurry and I figured with what was about to happen it wouldn't really matter.  Ready?

Bam! (please excuse dry cuticles - I ran out of my reg remover and had to use straight acetone and was without cream or oil...yikes!!)

Yea sorry for the crappy cell pics, but it was a crazy busy day and a girls gotta do what a girls gotta do.  These pics really dont show the full range of this polish.  It has a dramatic shift from pinks, purples, blues, greens and golds.  I could not stop looking at my nails all day. 
I used one coat of Seche Vite (even though I hate the shrinkage factor and the chip the next day factor...grr) to speed of the dry time.  Only drawback of this mani....Revlon Royal's crazy
staining.  I had never worn Royal before so I had no idea.  It's like a blue pen exploded on my hands....inky blue everywhere the second a nano drop of remover touched it.  Has this happened to anyone else? I love the color but I'm hesitant to wear it again.
Anywho, I would strongly recommend Boop-oop-a-dupe to anyone that cannot get their hands on Clarins 230 or Fantasy Fire.
One day I'll get around to doing a proper swatch of this polish.